As with the sink replacement, a toilet really is just as simple. It can be a little nasty, but I mean hey, we’ve already established that bathrooms are just gross.

First, let me share our toilet comparisons. The left is the old, right is the new. Just showing you all how we most definitely had an elementary school sized toilet in our home. Don’t be jealous.

How to Replace a Toilet
Supplies Needed:
wrench
screwdriver
utility knife
- Start by tossing some old towels on the floor in case you drop the toilet (don’t want to crack the tile) or water leaks out of it. Shut off the water supply to the toilet using the knob behind the tank. Flush the toilet multiple times until there is little to no water left. We had some lingering water, which I scooped out with a tomato paste can that I pulled out of recycling. I texted this photo to my family to which my dad replied, “A wet vac works wonders.” It was totally a palm to the forehead moment since we have a nice new wet/dry vac in the garage. But HEY, the tomato paste can worked great. We shoved a rag into the toilet bowl to soak up any water we couldn’t get.

- Go ahead and unscrew the water line from the back of the toilet using a wrench. Pop the caps off the sides of the toilet that cover the bolts on the base. If you can’t pop them off by hand use a flat head screwdriver. Remove the nuts from the bolts.
- If the toilet is caulked to the floor you’ll need to use a utility knife to score the caulk to loosen the toilet. Once loosened, gently rock the toilet side to side to remove. Lift the toilet, two people recommended, and either place it on a towel or run it straight to the garage in our case.
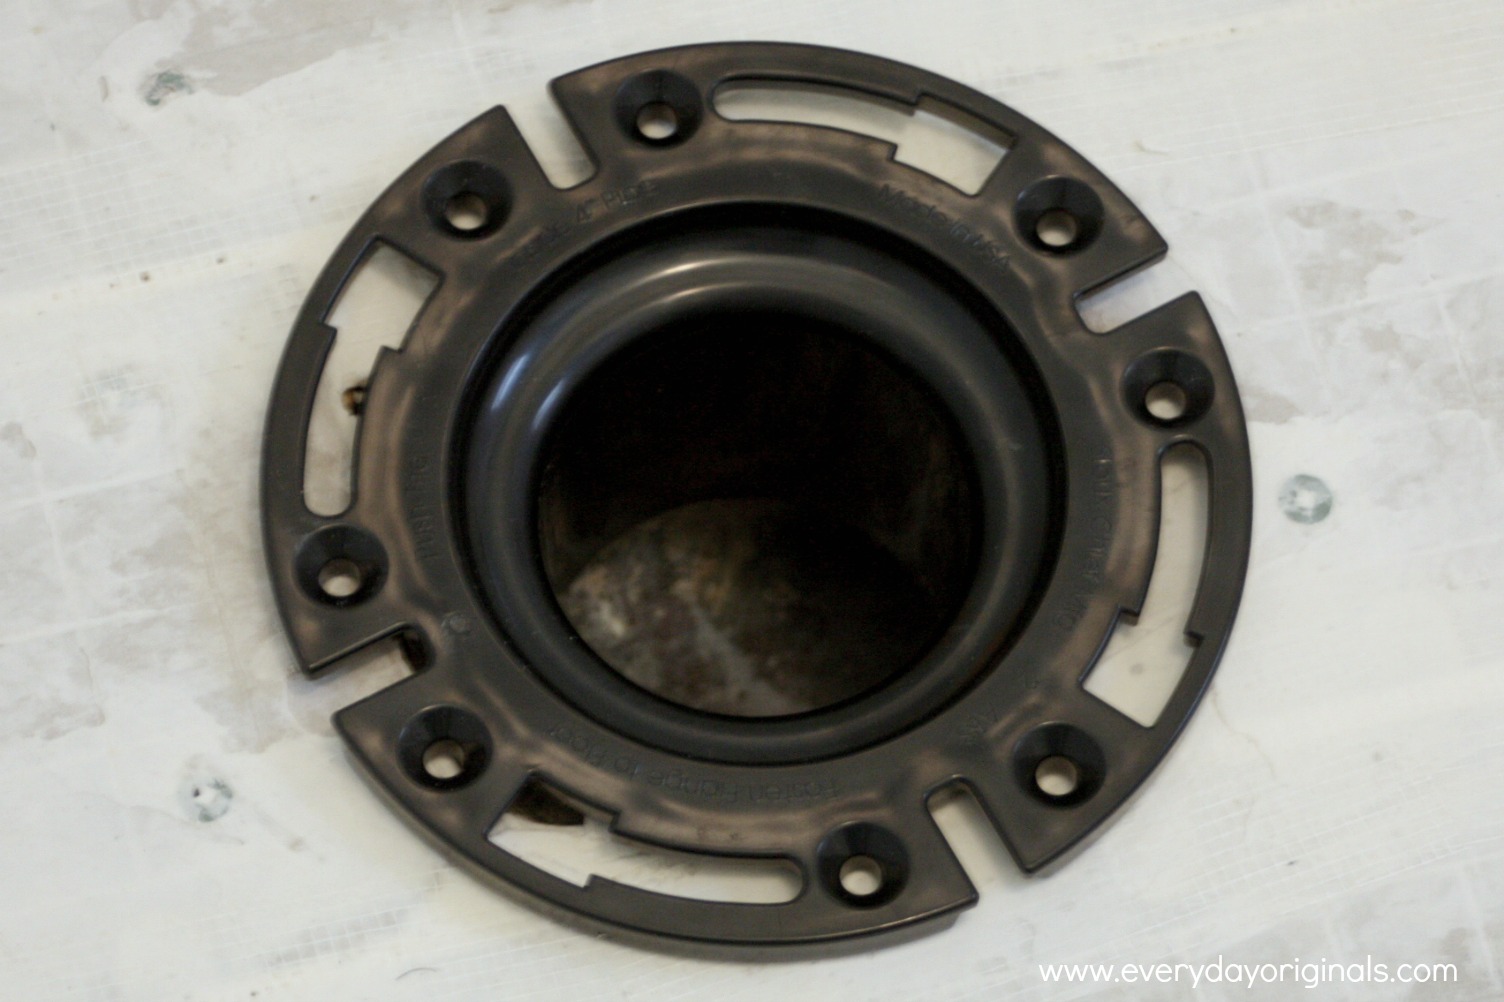
- You wanna see something nasty? Look at a wax ring that’s been on a toilet for who the hell know how long. Remove that thing and burn it. Okay don’t burn it, but dispose of it. STAT. You can see in the photo that it’s just waxed on to the flange and the flange is secured to the floor with screws. Unscrew and remove so you will just see the pipe sticking out of the floor. In our case the flange was in bad condition so we replaced that too, you may not need to in all cases.

- Install the new flange according to the directions on the package. Ours was simple, it just screwed into the floor, similar to the one we removed. Same with the wax ring, we followed the instructions on the box as some of the installation methods vary.

- We then placed the toilet onto the floor and wiggled it just a tad until it shifted into place on the wax ring. Once it was settled we screwed it down with the screws that stick up from the flange. There are mixed reviews on if you need to caulk a toilet or not. I didn’t really conclude that one was better than the other so we didn’t caulk it.

- Last step is to reconnect the water line behind the toilet. Once that is connected turn the water on and let the toilet fill fully before flushing it. Cross your fingers that everything is accurate and there are no leaks!


As with the sink, if the toilet is in good condition toss it on Craigslist to see if you can make a few bucks for it. We sold ours for $20. Other option, put it on Craigslist for free – then you don’t have to deal with disposing of it!

Finally, I found how to replace a toilet easily. All the point are useful.
Thanks for sharing.