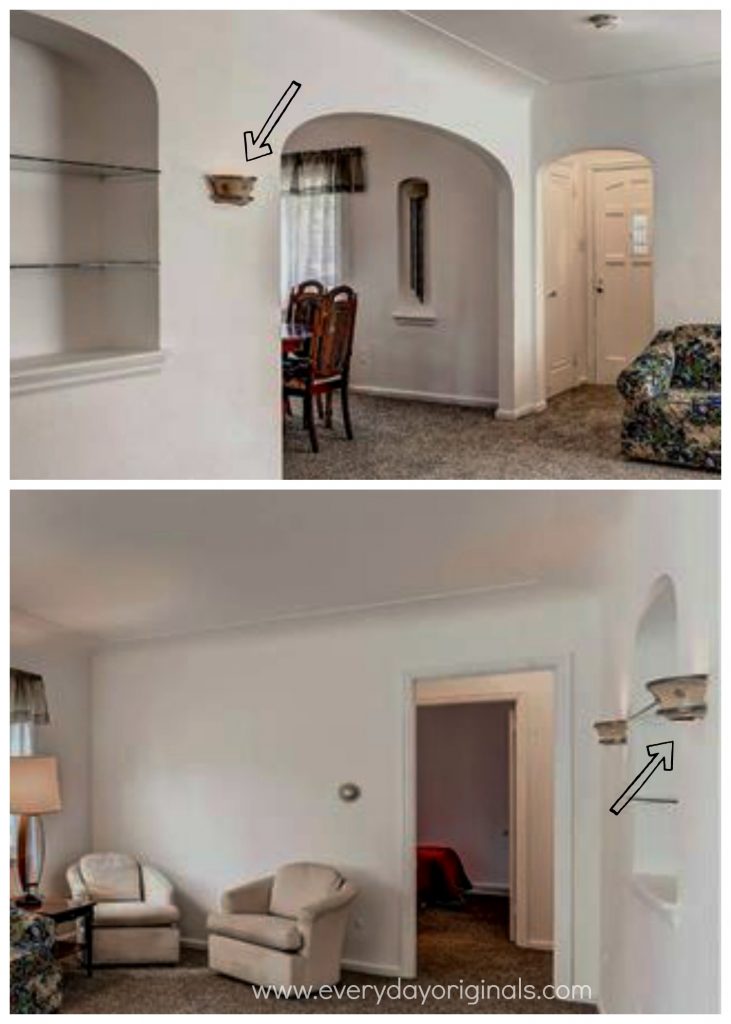
The wall sconces in our family room were kind of an eye sore. Though, they’re the only source of light, aside from lamps we’ve added, in the whole room. Which meant we kind of needed them.
Here’s the before, the photos from the listing of our house:
I started researching around and everything I was finding was $40-80 per sconce. Which, I mean, I’m all for a good light fixture but not for that much. The other problem we were running into was that all the sconces we were finding were either for lights connected to a light switch, or needed to be plugged in. Those options didn’t align with our situation, which was that each sconce had a switch on them individually.
In the end we decided it would be really great if we could leave the base of the current sconce, not have to mess with any wiring or installing of switches and just get some new shades. That opened a whole new can of worms because just a shade, specific to our sconces, was tough to find. So, ya know, I made them. And it was incredibly easy.
How To Make Wall Sconce Shades
Supplies
(makes 2 shades)
2 wood quilting hoop (I used a 9″)
white poster board
1/2 yard of fabric
4′ plastic corner guard
3M strips
hot glue gun
tape measure/ruler
branch cutter, saw or scissors strong enough to cut through wood
Method
- Start by taking the inner circle out of your quilting hoop. This is the part of the hoop you’ll be needing. Using your ruler, measure that and cut perfectly in half. I used intense branch cutters, but if you have sharp enough scissors that’ll probably do. You’ll now have two half circles.

- You’ll want to cut a piece of poster board to fit the wood pieces. Now, you’ll need to decide how far apart you want to space your wood pieces. It’ll depend on the sconce your covering. Ours was 8″, so I cut a piece of poster board to fit the length of the wood and then the width we needed.I used my hot glue gun to secure everything, but quick disclaimer. We’re using LED lights that give off little to no heat, and our sconces are open on top and bottom to allow any heat to escape. Because of this it was safe to use the hot glue gun. If you have a different situation choose adhesive accordingly.
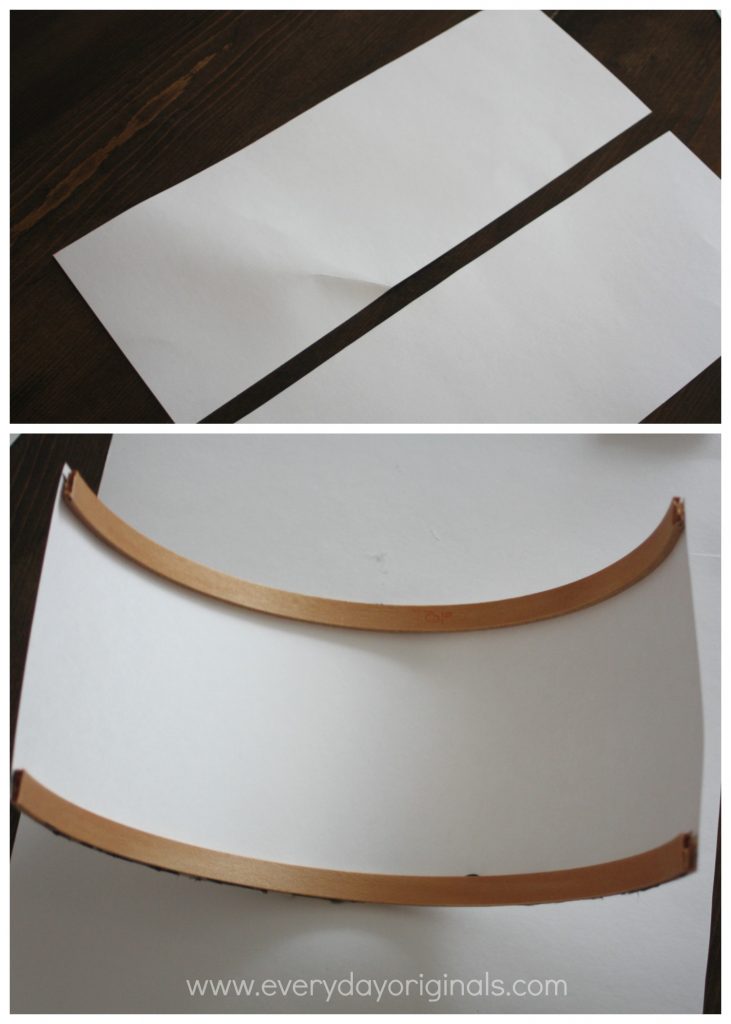
- I lined the edges of the piece of poster board with hot glue and then firmly secured the wood pieces. Once this was complete I trimmed off any glue that was exposed (easier to do while it’s still warm).
- The fabric I used was some that I had leftover from an old project. It just happened to be the color gray I wanted and have a subtle pattern in it. I cut the fabric, similar to how I cut the poster board, though I left a little bit around the edges, enough to fold over and glue.
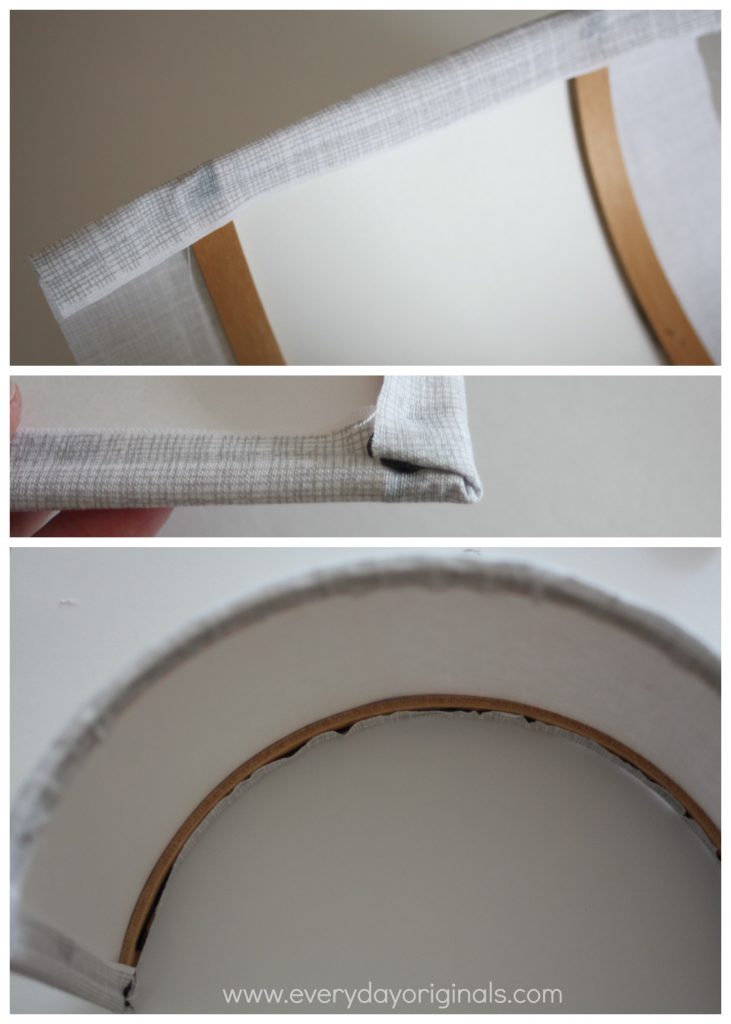
- I started by folding one end in and gluing only on the wood pieces. Do not glue on the poster board (you’ll be able to see it when the light is illuminated).
- I then lined the first wood piece with glue, folded the corner in and then tightly secured the fabric to the wood. You will have a bit of overhang that you can trim later.
- I repeated steps 6 and 7 for the other piece of wood. You can then go around and trim any fabric that hangs over the wood. You don’t want the fabric to hang over the wood as you’ll also be able to see that when the light is illuminated.
- Next you’re going to take your corner guard and cut two pieces to match the width of your shade. These are easy to cut with scissors. You want to position each corner guard a few millimeters from the edge of your shade. Glue just the ends, so where your wood pieces are. Again, no glue on the poster board!
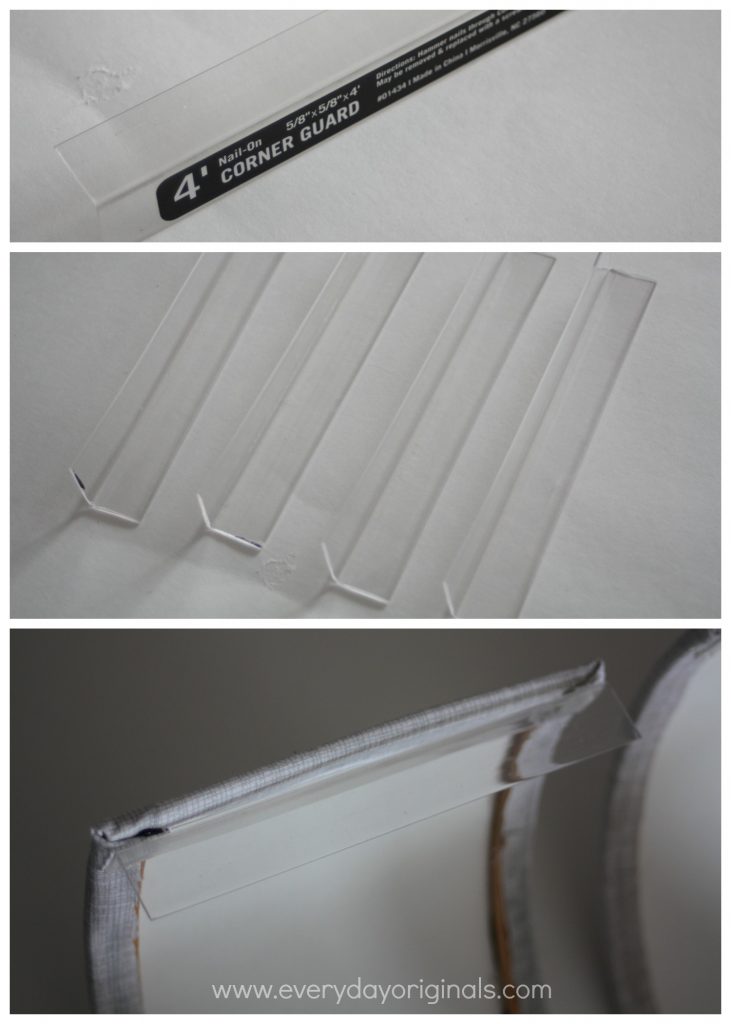
- You have now made your shade! I found the best way to hang was using 3M strips. I cut the strips to fit the plastic of the corner guard. Using a level I then measured where the shade would need to hang over the light fixture. Once I marked where, I then firmly attached the shade to the wall.
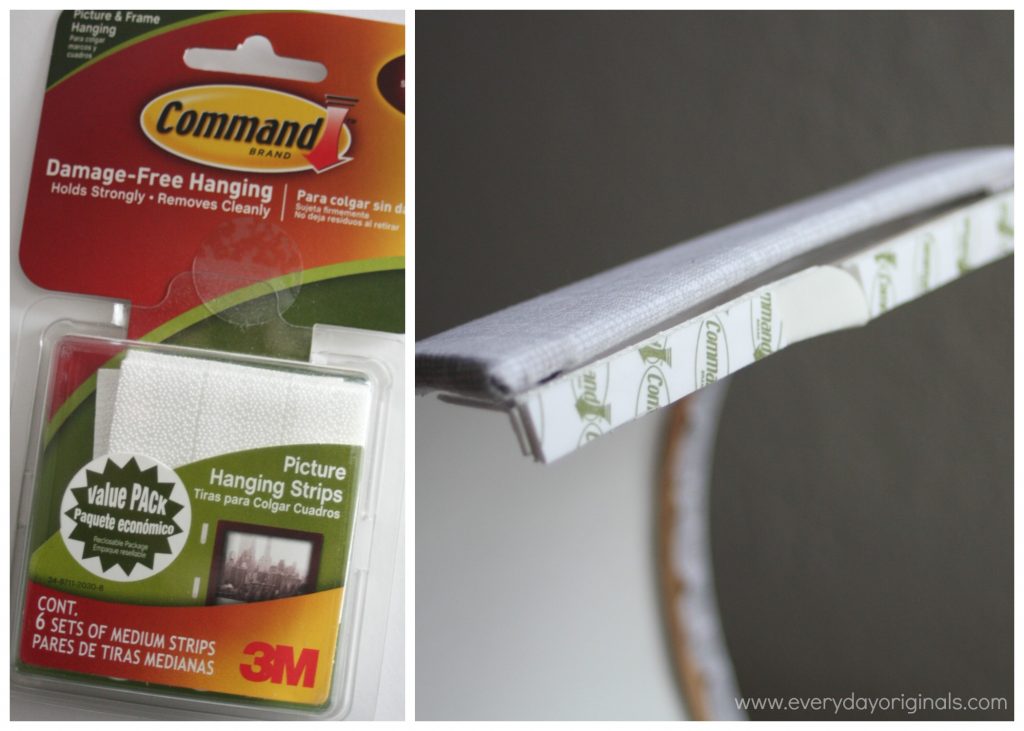
Now, a few things. Your sconces might be very different. This method can work for any type, you may just need to adjust based on what you’re working with.
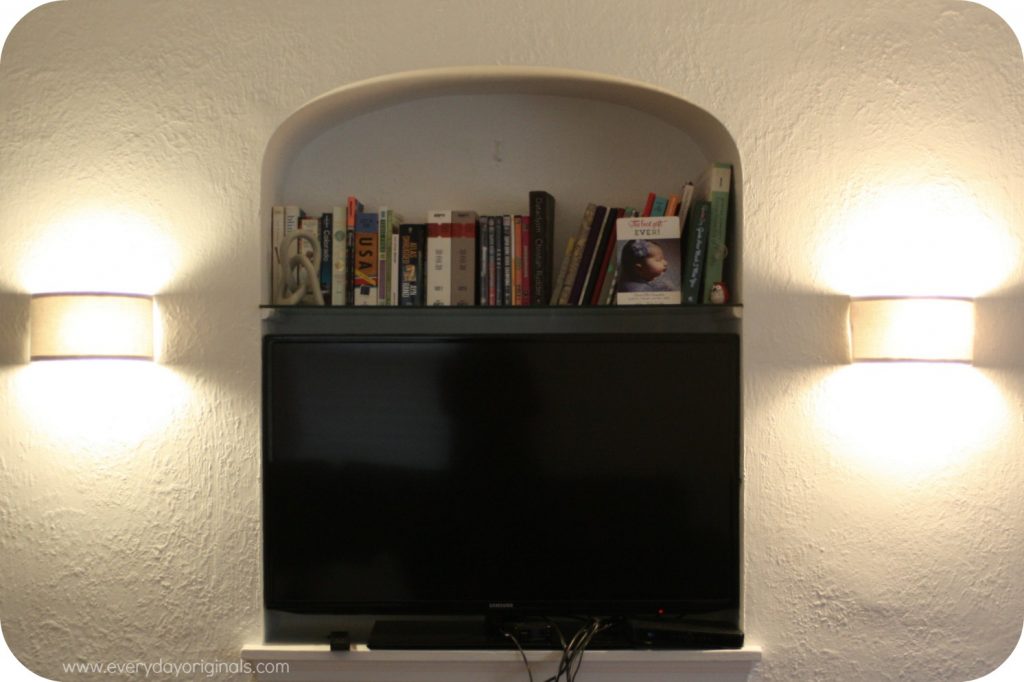
Your shade size may vary, also adjust that based on your needs. This is just a guide to get you started and a method to alter. It was SO easy, despite the many steps above (I just wanted to be clear!). I already have a few other places to use this method in our home!
For the cost breakdown (I made two sconces):
- Poster Board & 2 quilting circles – $4.22 total @ Joann Fabrics
- Corner guard – $3 @ Home Depot
- 3M strips – $3 @ Home Depot
- Fabric – had
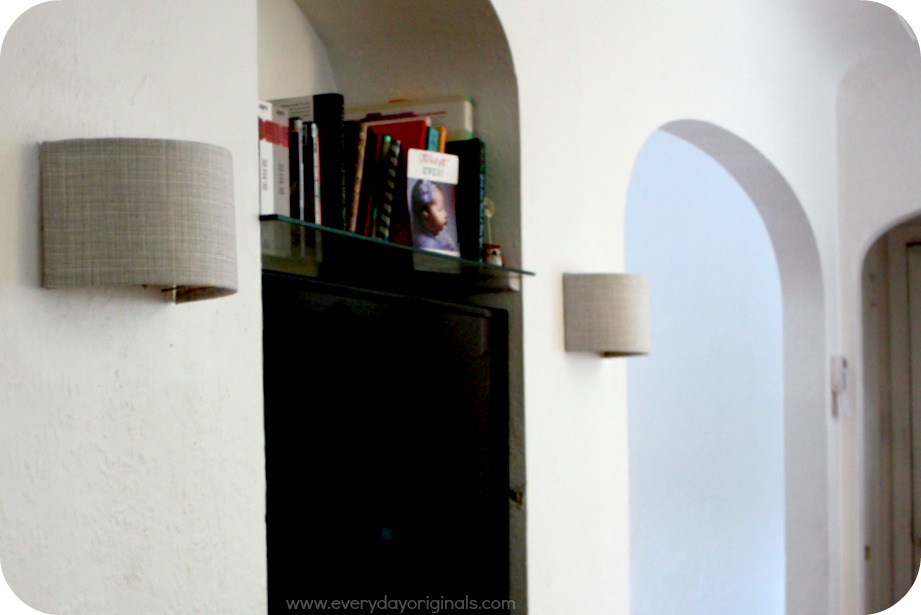
A total of: $10.22 or $5.11 each! I really couldn’t find any for less than $40 so this was pretty phenomenal to me. And, they were actually kind of free because I had a gift card to both Joanns and Home Depot!
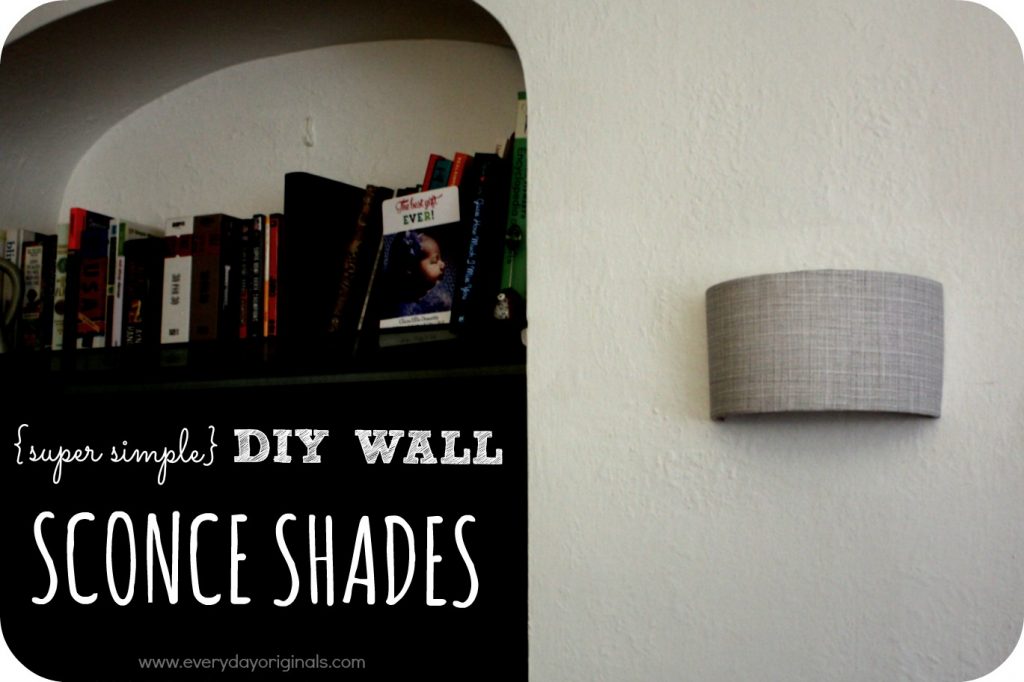
Hi,
I’ve seen this done before, and I have a (maybe dumb) question: Why couldn’t someone – oh, say, someone who is all thumbs and really bad at crafts *cough* – just take an ordinary lampshade and cut it in half?
I want 2 sconces for my hallway, to put battery operated timed candles in (pillar candles). I guess I would have to figure out how to make something for the candles to sit on, inside the sconce, too.
Any help you can provide would be appreciated. Thanks.
Hi Victoria! You can absolutely use a lampshade and cut it in half – however it would have to be the perfect size and have straight lines so that it hung correctly. If I had found the perfect one I would have used that technique…but I never found the right one!
With your project you could secure something to the wall to hold the candles. I’m thinking something along the lines of a small piece of wood with an L bracket. Secure the L bracket to the wood piece and then secure the L bracket to the wall. I hope this makes sense…maybe I should do a post about this! Once the little shelf is secured you can then use whatever shade or sconce you have and place that over the shelf with candle and secure that to the wall. This is a great idea, I think I’ll try to re-create this sometime this fall to show readers how this could work if you want to make sconces with candles. Good luck, report back on what technique you end up using!
I want to cut a fabric-covered shade in half to fit a pair of spider- fitted lamp harps.
Instructions are somewhere on Internet but I can no longer find the site. My question is, how do I finish the cloth edges where I made the cut? I do recall how to glue a narrow board across the wire base and fasten a washer
To accommodate the harp on the cut off side.Many thanks!
Hi Yvonne – hard for me to say without being able to see the shade and harp! Best bet may be to find a small piece of matching fabric. I’m not sure how much is showing from the cut. Wish I could be more helpful!
I’ve been looking all day (day off- normally don’t have the time) for something just like this! We are remodeling the rec room in our basement for more of a mature tv room, and there are these horrible 10 yr old sconces on the wall. But you’re right, if I stay under $75 a piece, I’ll just end up with similar ugly sconces. Your shades will allow me to keep the current bases, and simply hide them, while getting rid of the shade. Thanks!
I’m so glad it’s helpful to you, Jennifer! We’ve received more compliments on these sconce shades than I ever thought possible. I didn’t even think people would notice them, but I think they’re modern looking, clean lines and a little bit different than the “fancy” sconces you would buy in a store (which just aren’t my style). Good luck to you!
What type of lighting did you use for inside of your scone
Hi Kimberly! The lights were already there, they’re original to our house. Sorry I can’t be more helpful!
This is a great fix for a rental house! We have horrible sconces and I can’t replace the whole thing but now I can update them!!!!! Thanks
Yes, you’re right – It is great for rentals too! Good luck!
Hi Lindsey, I made a sconce using your method. Wish I could send a pic. I used sheer silver ribbon and added a crystal trim to match.
Beautiful! Ours are still looking great a few years later!
Chantelle,
I’m about to endeavor upon this project and wanted to incorporate a little bling/crystal into mine. Would you send a pic of yours.
Thanks,
Nicole
nsdobbins@yahoo.com
Thank you so much for this post. I have been researching how to diy this for over 2.5 hours…literally! But everything that was diy seemed far too difficult & time consuming. But this one seems far more simple than any others I’ve seen this evening. I can’t wait to try it!!
Ours are still looking great 4 years later! Good luck!
Hi there!! I am so sick of these oval shaped looking shades in my office, anyway I cut a square lampshade in half attached the corner guard and viola done and done!!! Thank you for the info. because the ones I wanted cost 125.00 I realized I can paint a bear and a moose pattern via stencil…
x2 Lampshades 10.00
Lodge pattern stencil free via internet
paint materials already had
rustic ribbon 2.50
12.50 yayyy!!
Perfect!! That’s a great idea!