• About
    • Contact
    • Disclosure
  • Home
    • Organizing
    • Food
    • DIY
    • Holidays & Gifts
  • Life
    • Motherhood
    • Career
  • Family
    • Travel & Fun
    • Kids
  • Blog
↑

Lindsey Thomason

Simple Life + Working Mom

  • About
    • Contact
    • Disclosure
  • Home
    • Organizing
    • Food
    • DIY
    • Holidays & Gifts
  • Life
    • Motherhood
    • Career
  • Family
    • Travel & Fun
    • Kids
  • Blog
  • About
    • Contact
    • Disclosure
  • Home
    • Organizing
    • Food
    • DIY
    • Holidays & Gifts
  • Life
    • Motherhood
    • Career
  • Family
    • Travel & Fun
    • Kids
  • Blog

an easy fix for old art

May 18, 2010 by Lindsey 4 Comments

A few months back I was out poking through antique stores with my mom when I came across this old fashioned silhouette framed art. I got it for about $6 and thought it would be a cute added touch to my nightstand.
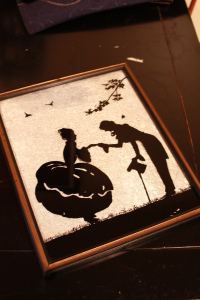
It was still in the original frame, and though it was cool, it was very worn down and had lots of sharp hardware on it.

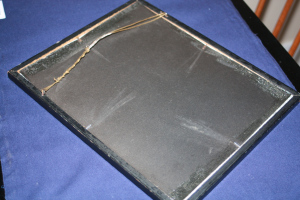
An easy fix was to just re-frame it. I was able to pull the backside off the frame, but then I realized that the image was actually painted directly on the glass and was backed with a silvery fabric.

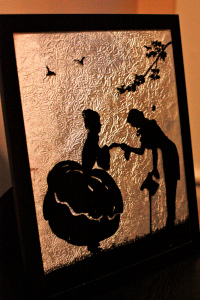
It was easy to frame and the glass from the original fit right into the updated frame. Not bad for some $6 art.
Share this:

  • Click to share on Facebook (Opens in new window)
  • Click to share on Pinterest (Opens in new window)
  • Click to share on Twitter (Opens in new window)
  • Click to print (Opens in new window)
  • Click to email a link to a friend (Opens in new window)

Filed Under: DIY Tagged With: framed vintage art, re-framed art, updating antique art

Comments

  1. nina says

    May 18, 2010 at 8:54 am

    Nice job, your choice of frame is better than the original. A tip for hanging frames art or photos-If you have old erasers or pencils that are dead but still have the erasers intact cut them down to size and with a little super glue or rubber cement put on the back corners so they don’t leave a mark on the wall should you decide to change placement.

    Reply
  2. Lindsey says

    May 18, 2010 at 11:18 am

    Nina, that is brilliant! I’ve been looking for that tacky stuff to put behind the frames on the wall so they stay in place and don’t scratch. This is a much better and easier option. Thanks for the tip!

    Reply
  3. Terry says

    May 18, 2010 at 4:16 pm

    Linds you should get the email address of the antique store that we like so much, she would love to see this stuff! Looks great.

    Reply
  4. ltthomason says

    May 18, 2010 at 8:11 pm

    I should, Mom. I use a lot of things from her store around the house. Next time we go I’ll let her know!

    Reply

Leave a Reply Cancel reply

Your email address will not be published. Required fields are marked *

HELLO!

Welcome to this journey of - simplifying life, finding shortcuts, keeping sane and staying happy as a working mom - all while focusing your energy where you want to. Was that a run on sentence? An almost missed swim class and appendicitis got me here... Read More

Join me!
Subscribe to the Newsletter

search this blog

Primary_Kids_Clothing_20_Percent_Off

Posts by Category

  • Archive
  • DIY
  • Food
  • Holidays & Gifts
  • Home
  • Kids
  • Life
  • Organizing
  • Travel & Fun

archives

Categories

Search

Copyright © 2025 · Custom Theme by PixelMeDesigns.com on Genesis Framework · WordPress · Log in