Two days left to enter the Country Chic Paint Giveaway! Head on over to Tuesday’s post to enter.
The front porch is not done. As seen by the green sides, unfinished roof, crooked lights and filth on the house, but it’s getting there. I thought I’d drop in with an update on what we’ve done thus far. I didn’t wash the house or straighten the side lights for these photos. These photos are a hot mess, but I mean this is real life. You should see the garage. To remind you, here’s where we started:
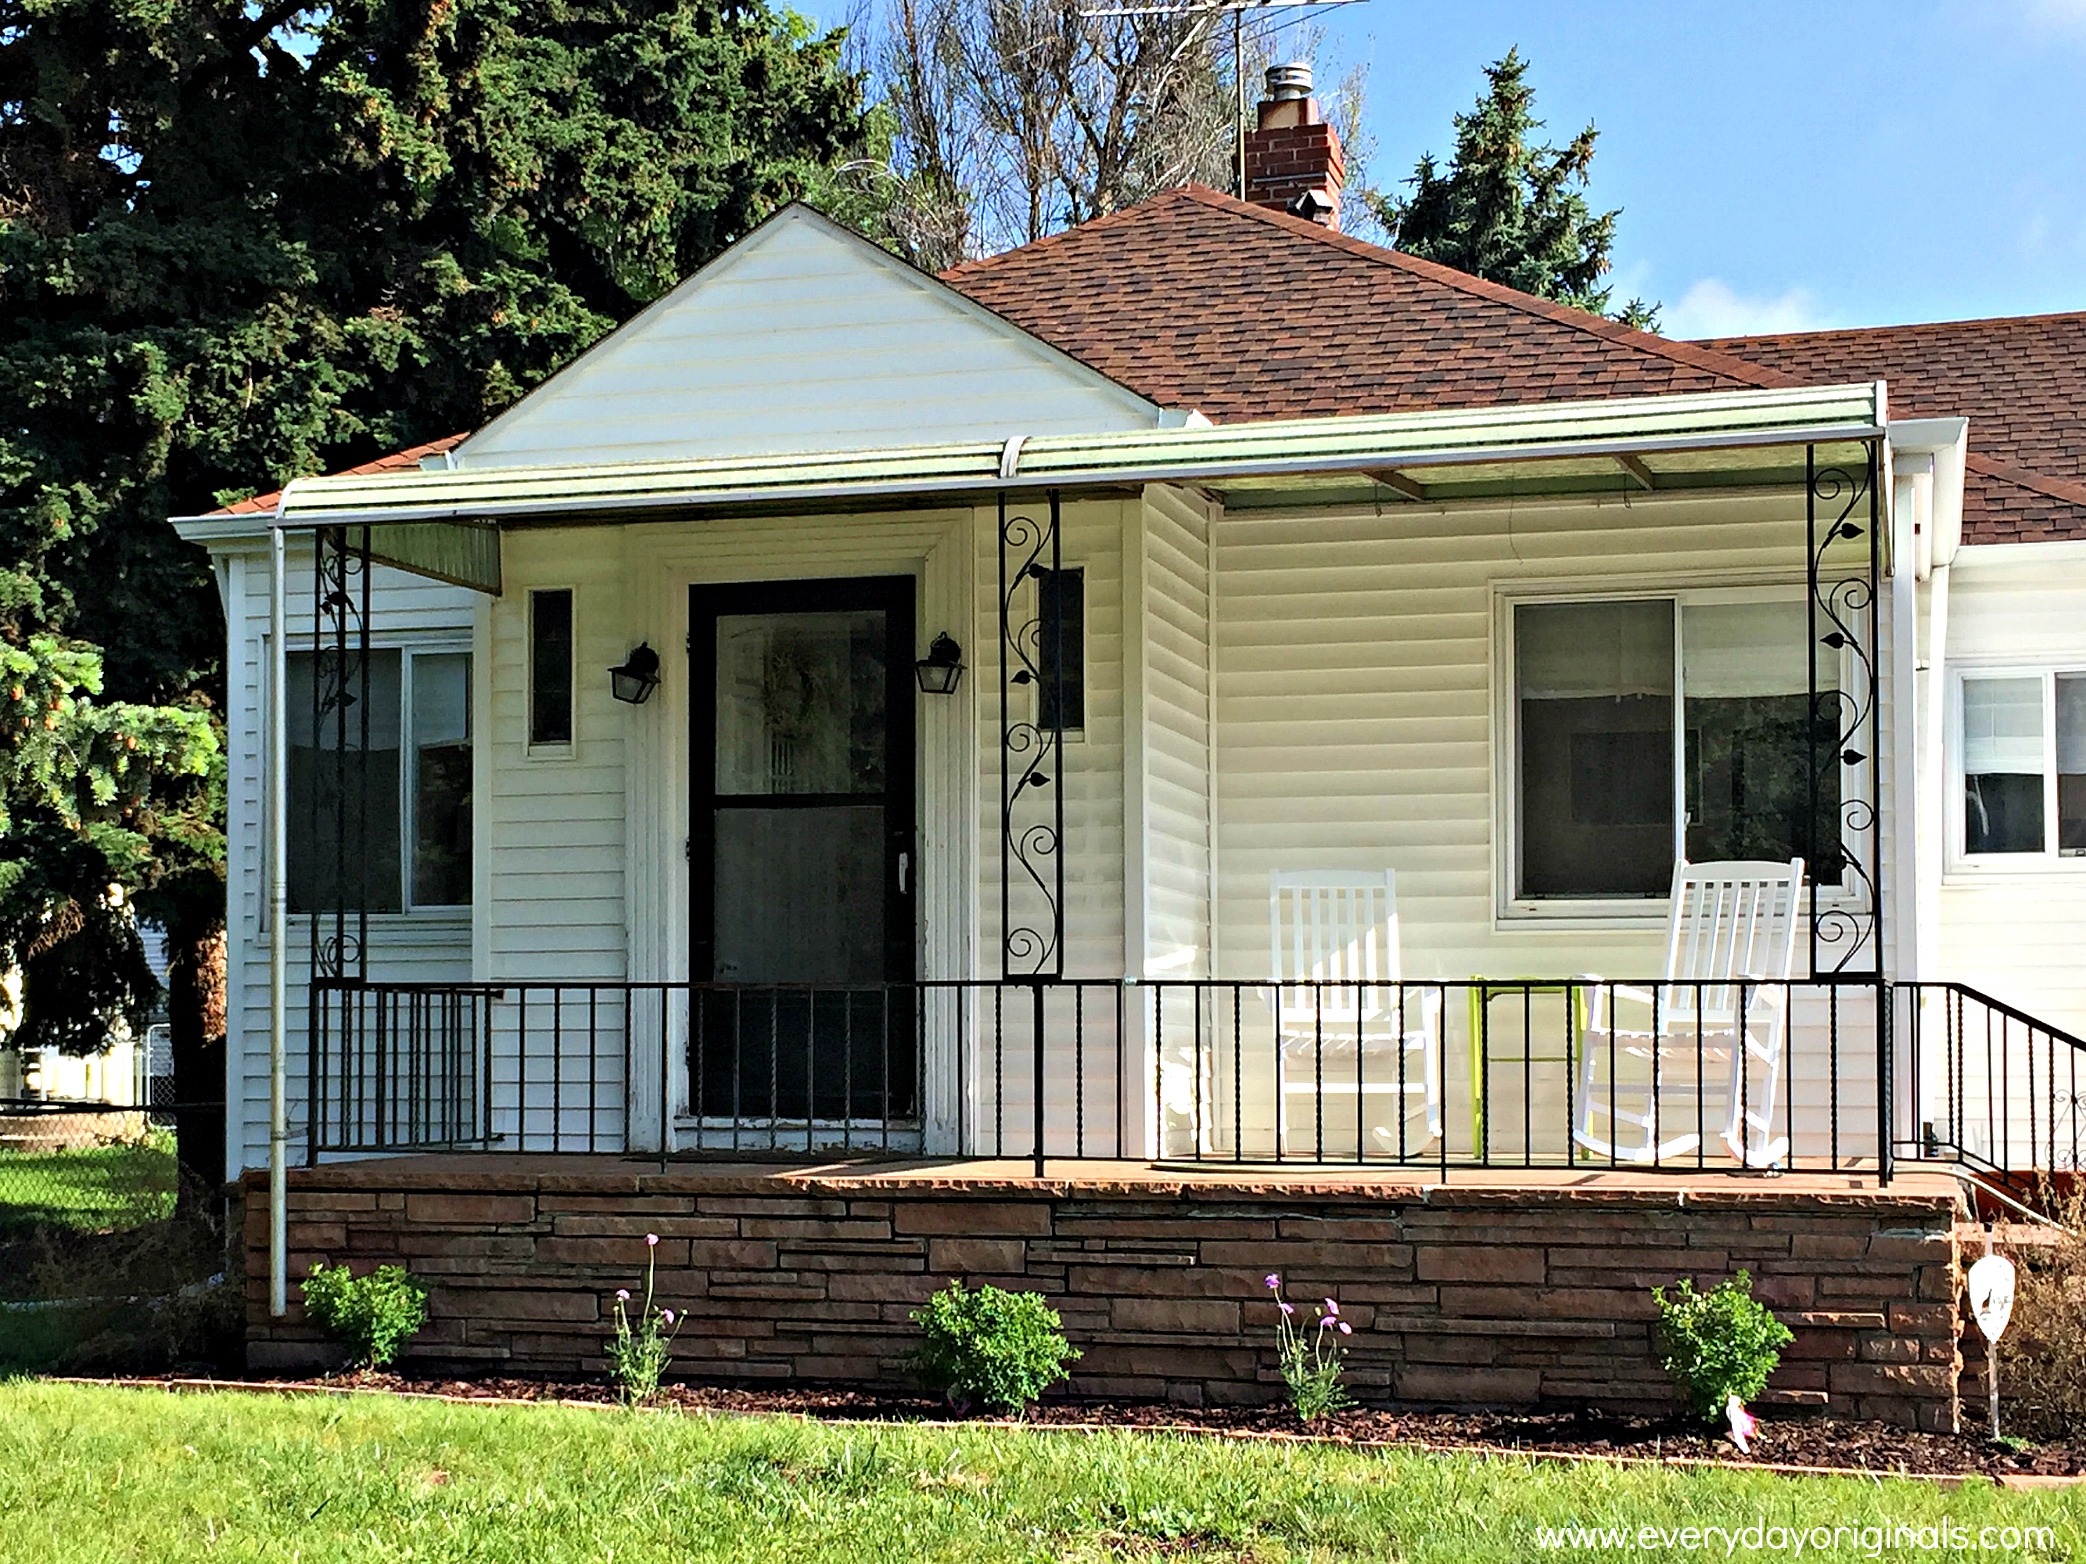 We hired a contractor, who taught us a lot about what you DON’T want in a contractor, to do most of the work. And honestly, after he was done we realized how we should have and could have done it ourselves. You live and learn, I guess.
 He and his crew removed the top of the porch awning which was cracked and leaking in many places. We kept the sides because if we had replaced those we would have had to replace much of the siding on the front of the house, a cost we weren’t interested in. You can see that the siding is cut around those side pieces.
 We had our contractor remove the rod iron supports that were holding up the roof and put in actual posts. For the roof, we kept the metal frame that the green stuff was on, added plywood and topped that with pro-panel metal roofing. We had to go this route because the roof line of our house is too low. In order for the porch roof to support actual roofing or shingles the beams would have been built too low, as in Al wouldn’t have been able to stand under the porch.
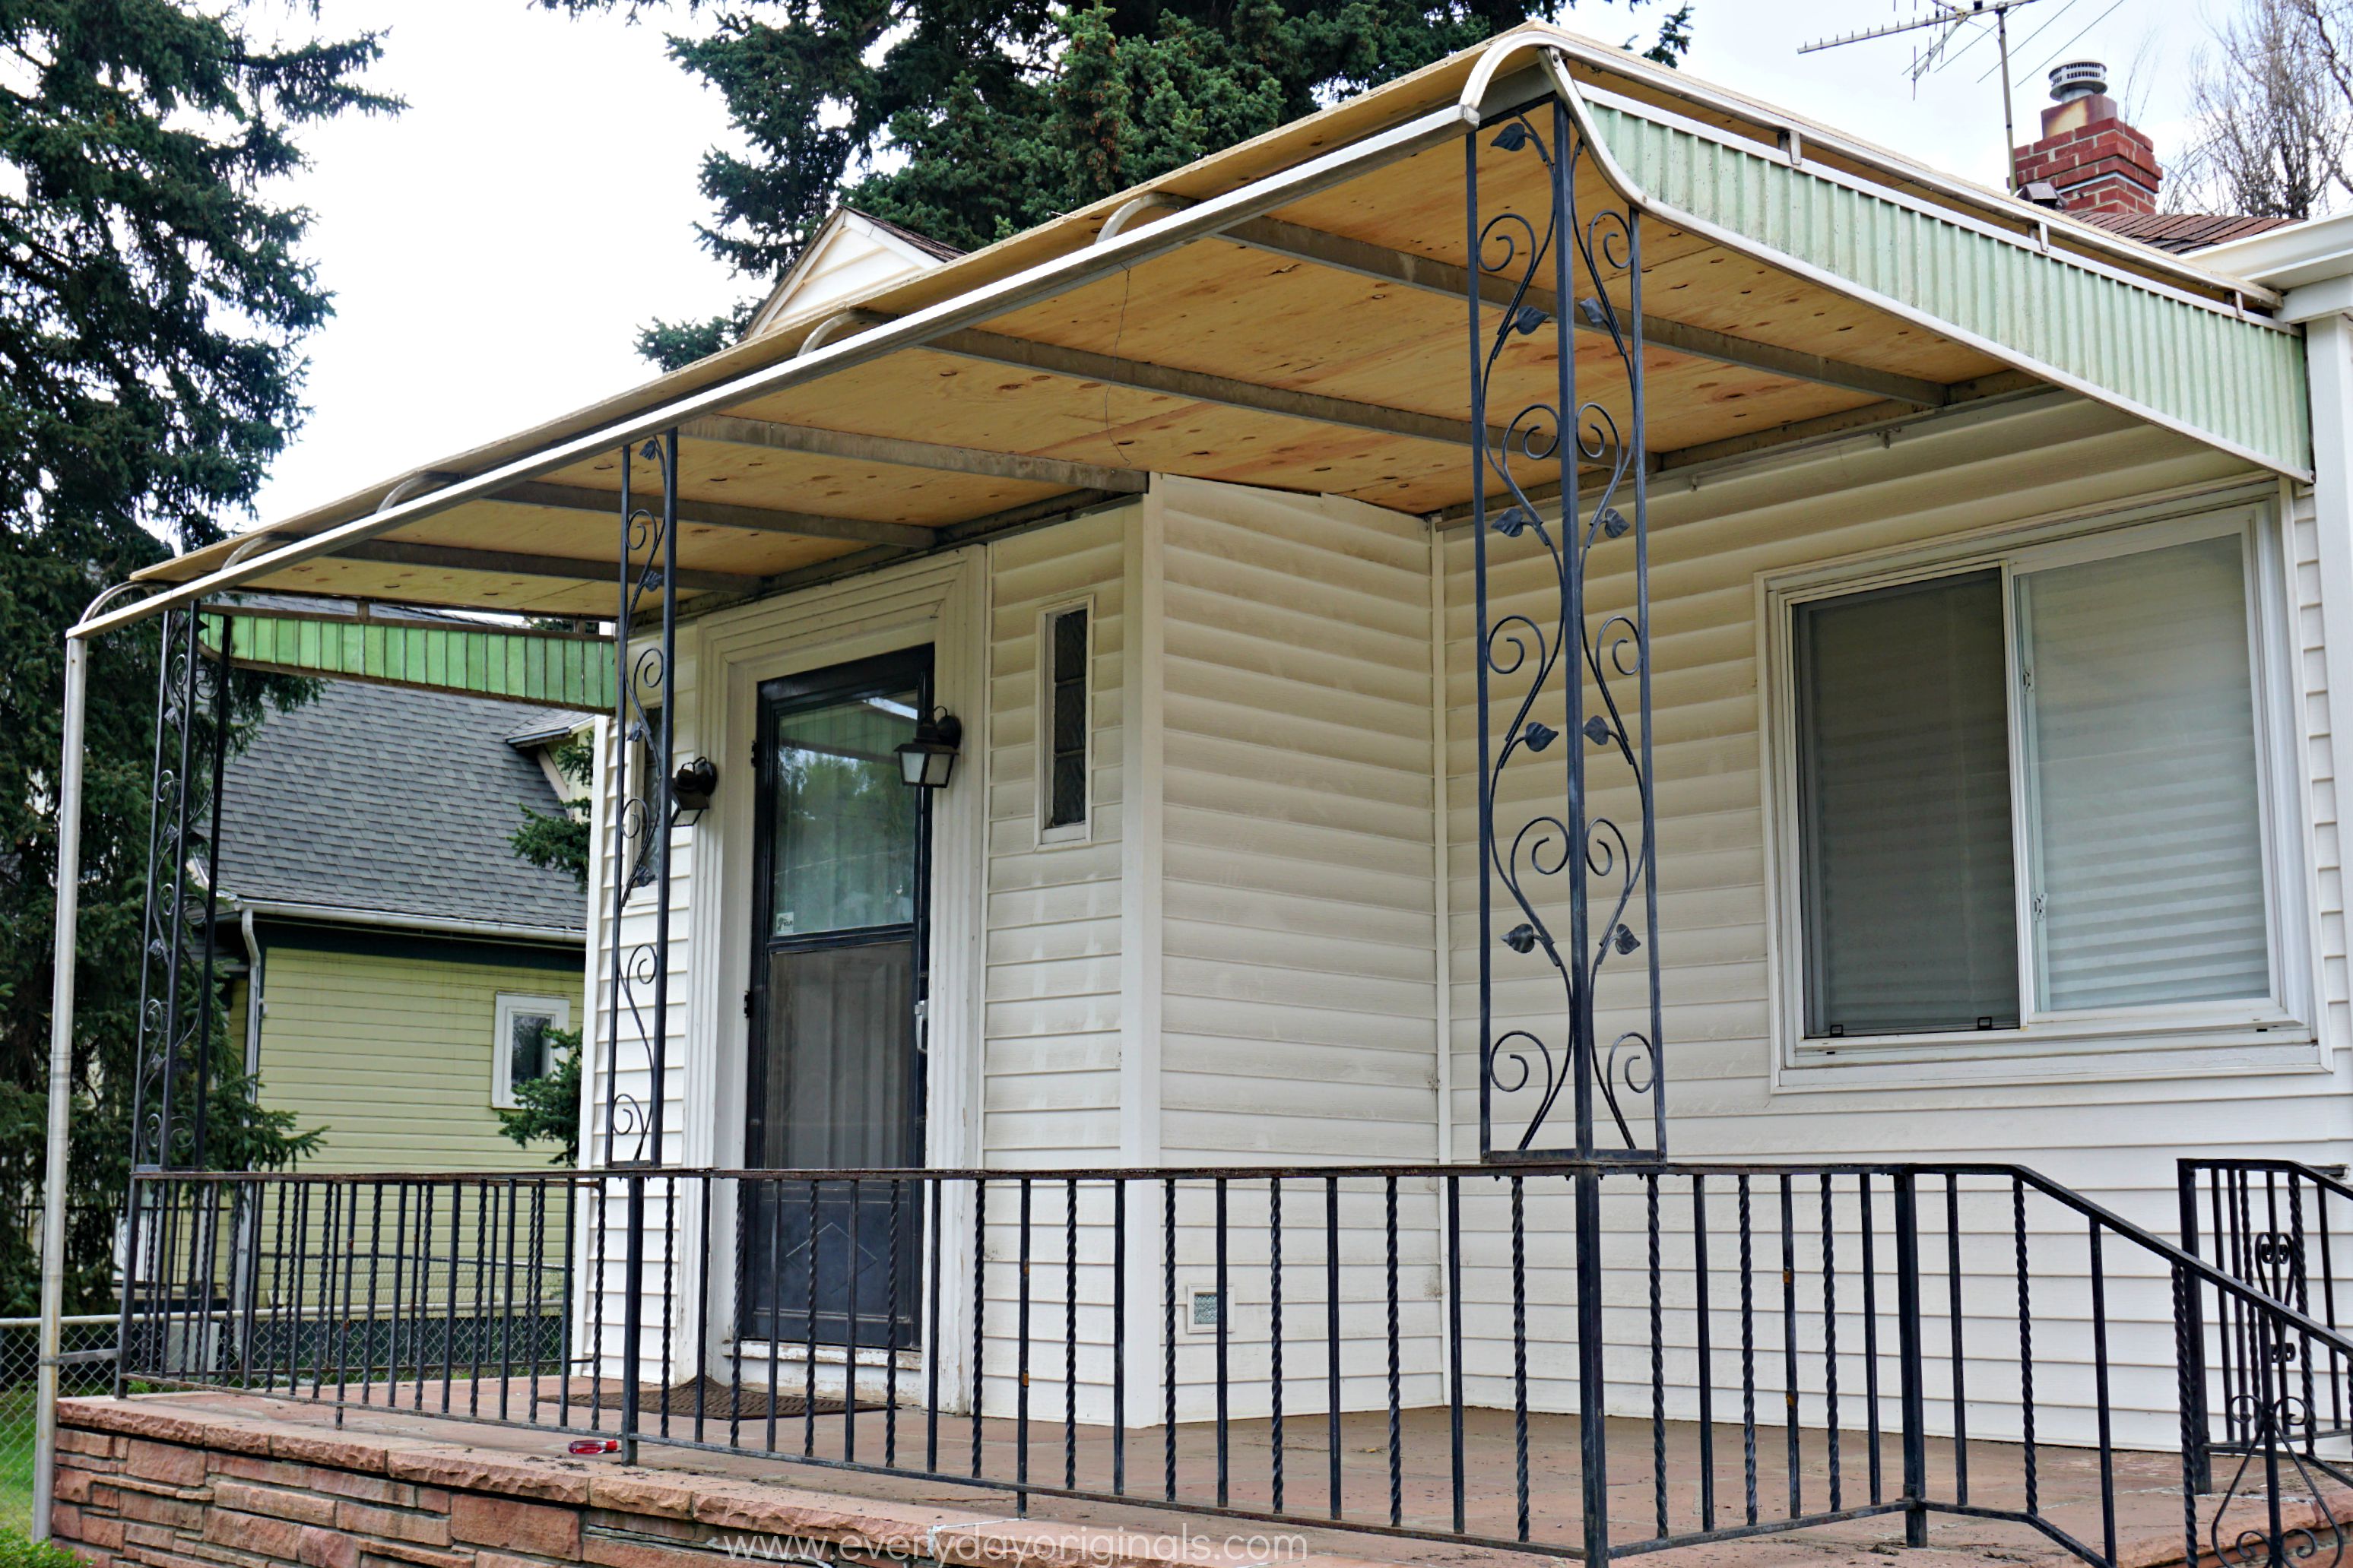 We could have raised the roof up, but that was turning a couple thousand dollar project into a $12-15 thousand dollar one – again, not something we were interested in. We just wanted a simple, covered porch that didn’t leak. Not to redo the whole roof line. So we went the metal roofing route since it was lightweight and didn’t need the support of a normal roof.
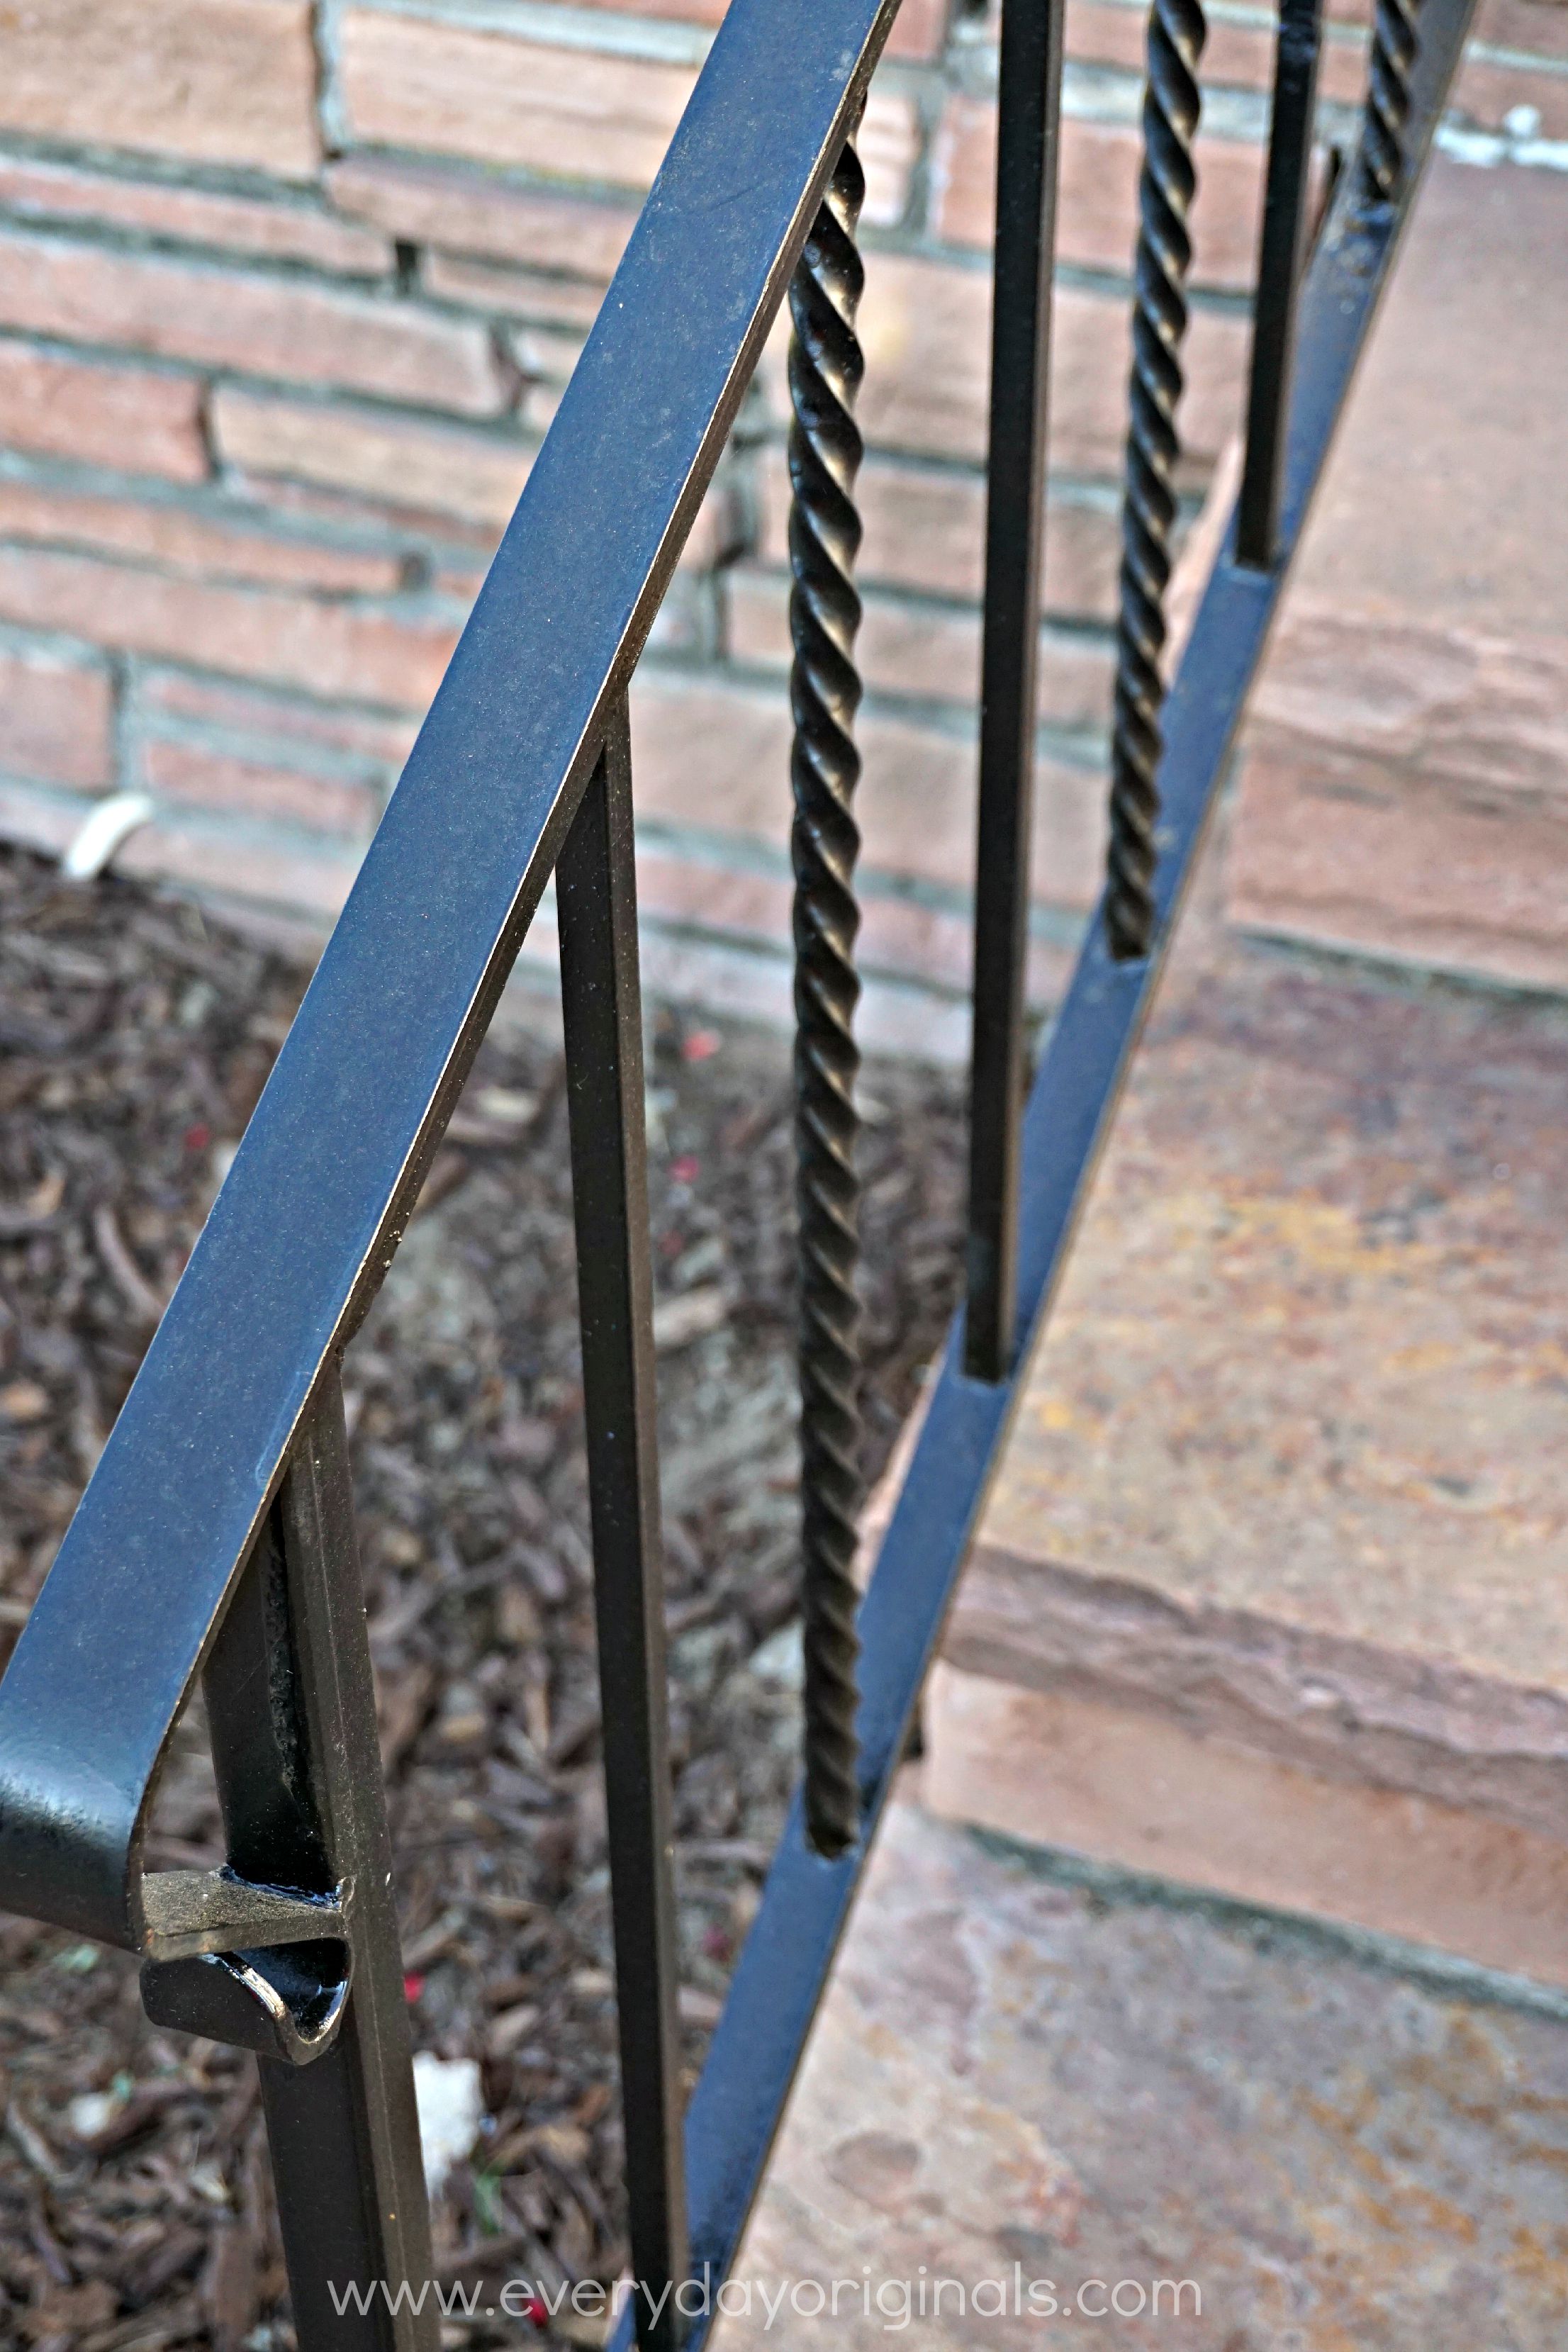
 We decided to salvage the railings for a few reasons – first they felt the age of the house and everything on the market now seemed too modern, second it saved us about $500 and third, I kind of, in case you didn’t already know, love reusing things whenever possible, so it was a no brainer. We started by removing the scrolly hearts as I call them.
 Our contractor sanded them and painted with Rustolem spray paint twice. He sanded, painted, sanded and painted to get the finished product. This was after the first coat of paint, you can definitely see the transformation!
 We still have a lot to do! We plan to add bead board on the ceiling of the porch and add moulding around the posts, both on the tops and bottoms, to make them look a little more finished. We paid the contractor to do the big things and left the smaller projects to ourselves. Though, like I said, in the end we could have and should have done all of this. But, it was nice to have someone else do a project for once,
 even if he was the worst ever.
We paid roughly $3300 for the porch thus far, without the additions we plan to make. Not terrible, but if we had done it ourselves we likely would have paid about $1200-1500 for supplies. Well worth the savings, but as I said, live and learn. We’ll be pleased with the outcome when it’s officially done and it’s nice to sit on the porch and not get dripped on when it’s raining!

Leave a Reply